Sunday, August 26, 2012


IKWYDLS 2012


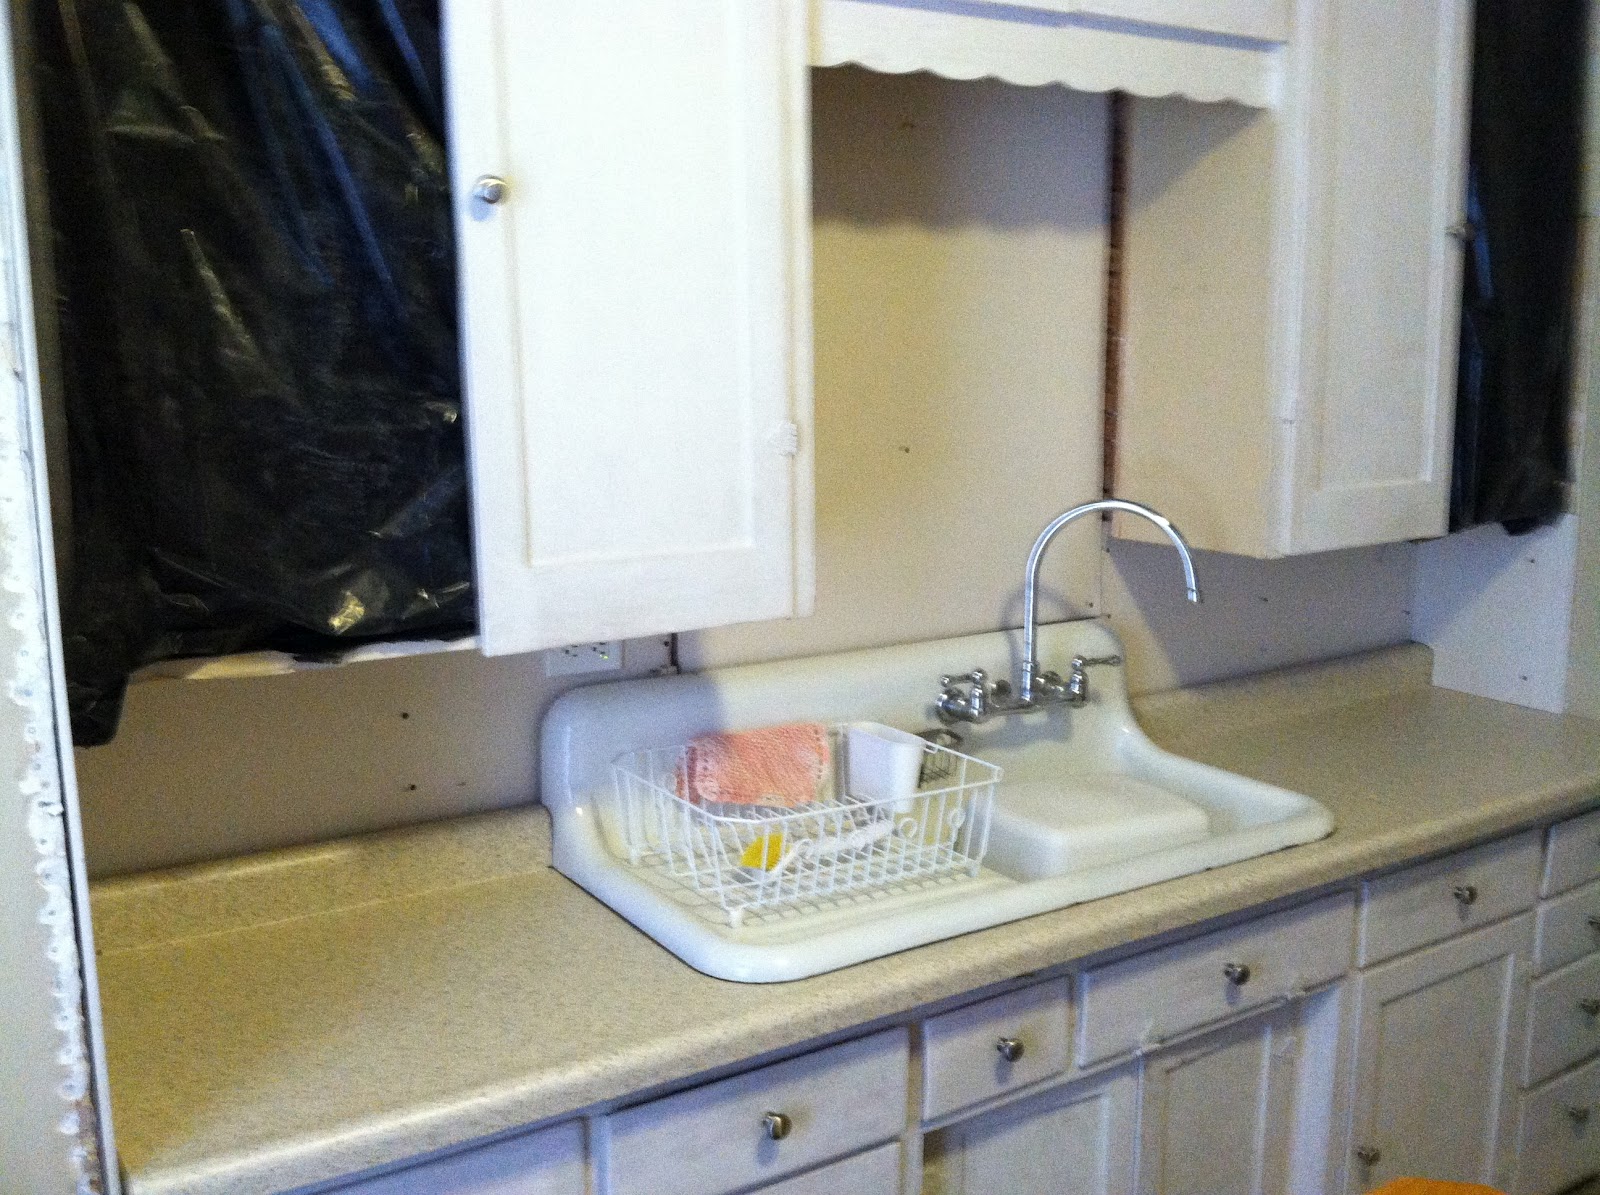
While the kitchen was on hold, I have been working on another project...

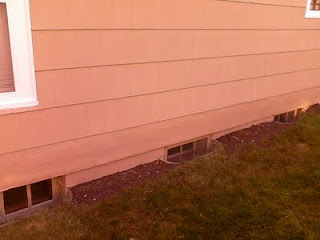
I have a friend who replaced her landscape rocks with wood chips and is giving away the rocks to anyone who will come and haul them away.  It's an hour away (Fargo), but still much cheaper than buying the rocks-- and I probably would have driven to Fargo to buy the rocks anyway because there is more selection in Fargo.  The first load I put on the north side of the house (where we previously had wood chips, ironically.)  Wood chips bio-degrade.  Between that and the dirt I dug and replaced to do the stucco and painting last summer, all we had around that flower bed was dirt.  Now we have rocks.  Looks better and keeps the dirt from splashing on the wall when it rains.  The second load I put around the back steps and along the east side of the house, which is the side I posted for most of last year's pictures. 


Here is the timeline, then, for that side of the house going back to last year:


Now, hopefully, you also realize that the window wells have been raised-- because that was more work that is not pictured and I want credit for it.  Raising them makes for better drainage on that side and also allows more rock in the area without all of them falling into the wells.  Under the rock is a weed barrier, btw.


When we poured cement for our garage and driveway, our neighbor asked our contractor if he would fix the concrete at her front door and walk:

He said he would, but he wanted another project like ours for it, first, so that he could use the leftover for her small job.  That was a good plan, but he never got back to her.  I wanted to do it for her last summer, but I got too busy and overwhelmed by my own project.  So, I decided to resolve that issue this summer and now was the best time to do it (work is going to be crazy-busy again, starting next week.)

So today I took PTO because I had to burn a day before the end of August or I lose it.  So, I got up almost as early as usual, and drove to Fargo.  Now, the big plan was to buy a wheelbarrow in Fargo rather than locally because prices are too high locally.  But, the places I stopped did not have the one I wanted.  That, by the way, would be the one with the funnel on the end, which I thought would be helpful for pouring stuff like concrete.  It is.  I know this because I bought the one here in town.  The price wasn’t so bad, anyway, compared to similar sizes in Fargo.  But, another reason for the trip was to score some more rocks and the wheelbarrow was supposed to help with that project… except I didn’t buy one.  I did get some more rocks, though, the same way I got all the others:  One pail at a time.  However, the owner of the rocks was there this time and we got to talk a bit (about our kids—you know how that goes) and she helped with her own pail and shovel.  Sweet deal.

When I got home, I unloaded all the rocks.  I have now put rocks everywhere that I have ever considered putting them.  I really don’t need any more.  But, they are not all gone yet.  Maybe I will ask my neighbor if she wants to do the same thing on her troublesome side of her house.

Then, I started in on my real job for the day.  I wheeled my wheelbarrow and shovel 50 feet to the left and started excavating the junk dirt that was under Mary’s cement problem.  Some of it is sand, so it was a little bit correct, but mostly it is various forms of black and gray sticky mud.  I piled that up on cardboard and her sidewalk.  I am not sure what I will do with it.  But, it can sit there until the rest is done.  The objective was to get that all out and my forms set up so that I could begin filling in the class 5 gravel that is the best material under concrete.  Technically, it is the expensive stuff and more than I needed.  However, the minimum charge for bringing a truck of anything anywhere is $65.  So, my 3 yards of class 5 costs the same as 1 yard of class 3.  The delivery was scheduled for 1:00.  He was a little later than that and I wasn’t quite ready anyway, but pretty close.

Here’s the math:  The piece I am doing is 8ft x 6ft which is 48 square feet.  The slab should be 4” thick.  4 inches is one third of a foot (12/4=3) so the cubic measurement is 48 x 1/3 or 48/3=16 cubic feet.  A “yard” is actually a cubic yard, so 3x3x3 = 27 cubic feet.  So, I needed less than one yard.  But, I have another project for pavers on the side of my garage that currently has no walkway (it borders the garden) so I need about 1.5 yards for that.  And, as I already mentioned, 3 yards costs the same as one yard, so since he is coming, he might as well bring all of it.
Here’s the downside:  moving 3 yards of gravel with a spade and a wheelbarrow is a day’s worth of hard labor by itself.  I also had to spread the bit I needed for the job around and tamp it down.  I did all of that, but then I had to get the rest of the pile off the public sidewalk (to be courteous)—one load at a time.  Well, as I was doing that a dude cruises by in his Bobcat, skid-steer loader with a jack-hammer attachment.  Obviously, he kept on going.  He is a contractor working on some curb repair for the city down the block a ways (yonder, if you prefer.)  But, on his way back, he had his bucket attachment and he swings over and asks if I would like to make my day 20 times easier.  Well, as a matter of fact, I would.  He couldn’t actually haul it all the way to where I needed it without making a mess of the garden, but he was able to move almost all the pile much closer in a few minutes—all for a simple, “thank you.”  Thank you, Lindberg Construction dude!  I still had to move every ounce of the 3 yards with my shovel and wheelbarrow, but I had to move it a much shorter distance.  Technically, the measure of that difference is a savings of horsepower.  But, unless you are an engineer or a geek, that’s just boring.  (Hint:  the definition of horsepower is actually a measure of force and distance, so reducing the distance reduces the horsepower requirement.)

After a few days for it to dry and to allow me to put the bottom step together, this is the finished project.


IKWYDLS 2012

When I got to this point, we had a relative coming to visit.  So, I put the cupboard doors back on and painted around the sheetrock-- the walls that were finished at that point and took a picture.  This is as done as it will be until the tile is purchased and installed..


IKWYDLS 2012

Back to the kitchen.  Here’s a picture before the sheetrock:

…Which is before the window was closed off, so you are also treated with seeing the package of paper towels on the shelf on the other side of the wall…

And another picture showing the other wall along the counter:


That corner of the kitchen has been a problem since the last project, so it was nice to make that normal.  See, because of the old countertop, the corner went all the way to the corner, around the end of the plaster on that wall.  But, when I replaced the plaster on the other edge of the corner, I gained the depth of the sheetrock’s difference.  So the corner was… weird.  Basically it was less than 90 degrees or P shaped or however you would describe it.  Replace the plaster = fix the corner.  Normalcy prevails.

But normalcy is just not how this wall was constructed.

Before I get into that...


For perspective, here are the "after" pictures for the sheetrock since you have the other pictures and I just mentioned that:


Now, here is the back side of that wall:
Actually, I took this picture while I was working on it for a working reference.  I knew I would need to find those "studs" to hang the sheetrock-- which would be covering the "studs."  Zoom in if you have to, but notice that not one of the "studs" reaches from the ceiling to the floor in one piece.  Every one is spliced together from one or more boards.  The center right is the old window, but it now has a short stud running vertically down the center of it.  The far right is the old plywood wall which had holes cut in it to run the wiring you can see.  It had also bee cut up to access the plumbing for the sink (bottom right) and further right (not in the picture) is another panel cut to access wiring to outlets, switches, and a light for this area and that wall of the kitchen.  It turns out that the 4ft line is that line extending down from the old plywood, through the window, and through the back of the sink.  Since that is my seam for the new sheetrock, I had to add some "stud" segments of my own behind that line.


The sheer normalcy of this "after" picture cannot be overstated:

The plumbing is accessible from under the sink on the front side.  I took the before picture from the bottom of the stairwell looking up at the studs.  The after picture is from the top of the stairs looking across the wall.  Behind anyone standing at that point of view is the back door, which accesses the garage, which is the most common door we use since building the garage, so to look at a normal wall here is a major aesthetic improvement.


IKWYDLS 2012

The kitchen is not the only project of the summer.  I am also spending a ton of time out at the farm where I grew up.  Part of that is because Dad and Mom are both 70 and really can’t keep up with themselves.  In a very frustrating way, Dad (well, both of them really) seems very content to just let things go.  The short list is the lawn mowing and this series of pictures.  Father's Day weekend my sister and her family and I fixed some stuff.  We tried to rally the help of the other siblings, but after all of that, it was just us-- on Father’s Day weekend.  One of my other sisters texted me curious about how it went.  I sent her these pictures and these words:
We moved these (they have since been painted and look much better)


We hung this door back up (it was off the track and dangling crooked by one caster)

We fixed this door so it closes (it had been left open for months)


And we stood these tires against the wall (rather than lying in the grass and in the way)


And, of course, we mowed everything.

Thursday, August 23, 2012

We took a trip this late spring for a relative's graduation.  We drove.  It was a good time.  But, one of my personal highlights was this picture we took while eating at a "Chicago Deep Dish Style" pizza place.  Apparently, I was supposed to make a funny face, too.  Oops.  Love this picture, though =) 

IKWYDLS 2012

So, what to do with the window, now?  Close it.  It is now just part of the wall.
The wall itself is, of course, made of plaster and lathe.  That stuff has been cracking and falling apart all over the house all these years and I am sick of fixing it.  I certainly was not going to hang any glass tile backsplash to it.  The paint itself could flake off with the tile glued to it, or the plaster could, too.  Therefore, I removed it all and put up sheetrock.  Here’s the thing:  3/8” sheetrock is about half the width of the lathe and plaster.  The lathe is about 3/8" itself, and the plaster itself is about that, too.  All of that means that I really had to put up two layers of sheetrock.  I wasn’t going to do it, at first.  The glass tile is about ½ an inch thick by itself and it has a backing mud that is used to hang it up.  But, my lovely bride had second thoughts about the glass tile and thought maybe we should put up the pressed tin stuff like we have on the ceiling.  Well, that stuff is really thin—like 1/16” or something and would have left too much unsightly gap.  I put up a second layer of sheetrock.  That had another advantage which is that the seams are not in the same place as the first layer and it is some of the best drywall work I have ever done.  It is so good that my lovely bride is back to liking the glass tile again.  Why?  “Because now it is so much easier to picture without the gaps.”  Seriously?  Whatever.
Another thing you may notice from the picture is that the cupboard doors are missing.  That is because a 2x1 strip of wood mounts to the end faces of the cupboards which extends all the way to the surface of the counter top.  The only function they serve is to provide something to screw the door hinges into.  I suppose they provide a slightly cleaner line, too.  But, since they go all the way to the counter, I had to remove them to replace the counter and the wall behind them.
IKWYDLS 2012

The big project this summer outside of work is the kitchen counter.  The old one is a crappy laminate that is very old.  I don’t know how old it is.  I do know that it has been there as long as we have lived here, which is at least 5 years longer than most people go without an improvement.

The improvement is to replace it with… a laminate counter top.  Well, there ought to be a good explanation for that, but there isn’t.  There is this:  It is “temporary” and enough of an improvement to be satisfied for several more years.  This is not a new cabinets, new stainless steel appliances, and new granite counter tops kitchen remodel.  This is quicker, simpler, and cheaper.  It’s the kind of improvement that when you go and throw it all out to do a proper kitchen remodel, you don’t feel like you are throwing away a lot of money spent a few years ago—like other people do.  We shake our heads at these home improvement shows (which we watch all the time) and people see kitchens that are less than 10 years old, scrunch up their face, and say, “It all has to go.”  Everything in that kitchen is newer and nicer than ours.  But, our whole house is old.  Remodeling our kitchen is complicated and out of date by definition.  Nothing in our house is “open concept.”  So, at what point do we throw away the authenticity to change that?  We are more of the restore type—just newer and cleaner.  ‘Cause, seriously, our cabinets and countertop (and with each passing day our appliances) are pretty gross.  The walls, ceiling, and floor used to be gross too, but I replaced those a few years ago.


This is the “before” picture:
Not that you really can see how bad it is in the picture.  For one thing, the laminate has two seams right in front of the sink which are separated and peeling off.
The scope of the project was to be the countertop and back-splash.  But…. The current area above the sink has this bizarre window.  In defense, the kitchen has no dishwasher (appliance, that is.)  Some people get nostalgic about standing at the sink washing dishes and looking out the window.  I can appreciate that.  But, this window is not the window to the outside.  THAT window is several feet further back.  In the space between are the basement steps and about 2 more feet to the wall.  But, technically, one could at least "see out a window…" kinda.  We never got into that.  The space between is more of a storage area for us, and the actual window is as old and gross as any in the house, so the view was never that attractive to us.  We (read “I”) hung a piece of can’t-see-through-it fabric on the back side of it for years.  When our daughter was taking sewing lessons she sewed a better one together and that has hung there since and shows in the photo.

The first step was to pull the sink out, install the new countertop, and put the sink back-- quickly, because nothing can be out of service for more than a few hours or be messy, either.  So, this is a photo with the sink out and the old countertop removed:

“But… wait,” you say… because the only thing that is gone is the laminate.  Yeah, see, that’s what is so “fun” about old houses.  The countertop was built one board at a time just like the cabinets.  So, the countertop didn’t come out in one large piece.  It was several boards.  Thus, I took out the drawers and put in plastic, because all of those cabinets are open under there and all the demolition debris is just one more thing I don’t want in those already gross cabinets with all of our pans and such.

And here is the new countertop with the sink back in place:  

IKWYDLS 2012


Rapt, as you no doubt are, by minutiae you will quickly realize that this is failed journalism.  Failure, in journalistic terms, because this is so far into the middle of the process that it is nearer the end.  This, after all, is a week into the month of August.


Rapt failure, this.


However, I did have sense enough to take pictures along the way.  So, I am actually ahead of last year’s journal since I am beginning with pictures rather than adding them later.  I am just behind the actually blogging itself.


The first thing I did was get a new job—the good kind.  The good way to get a new job is to get a promotion.  I say that with the experience of someone who has had wayyy too many jobs by this point in my life.  Even I think I am flaky.  I have done plenty of the “get a new job” thing.  So, I am very certain that getting a promotion is much better.  You, however, can do whatever you works for you.


The job itself is nothing to brag about, really.  It’s just different.  And a raise.  And more time off.  And that is really the point of telling you all of this—I am able to do what I have done this summer because I have had the time off to do it, and that is different for me.  For the record, I love my job, it's just not a high-ranking flashy position or really close to anything like that, and I doubt I would brag even if it were.


And that brings me to the first picture:


This here is one of the first tasks I did in my new position.  When I tried to explain what it is that I do, I usually just explained that I do whatever they ask me to do.  It’s true, really.  Who am I to refuse?  The back story is that my “boss” ordered these panels one day and some other stuff including the magazine rack thing in the middle of it.  And, typically, by the time the stuff got here, it was mostly forgotten, so it sat and sat.  Eventually, the people in the warehouse got sick of it, but by then, my boss had me to send to get it and take care of it.  So, I had the fun of installing the miss-matched oddity.  It was fun, actually-- I enjoy building and construction, obviously.  There is an explanation for its oddities.  But, seriously, who really cares?  The point is, this is what it is.  And what it is was my job to put it together.


But, my job isn’t all oddities.  For the first time in all the time that I have spent there, I got paid to travel.  I have always enjoyed doing that.  Some of my previous jobs have allowed for that.  It was good to get to do that again.  I hope it continues.  And the place that I got to attend was the company world headquarters.  When we got there, we took a picture:


This picture cracks me up.  This picture exists because of all the good fortune I just mentioned.  So, just to keep me humble, it definitely needs to have the taker’s finger covering a chunk of it… and some stranger in the background.  But, for the record, this machine is one of the products we make and it is cool that it was on display in such prime real-estate.  For the record, I am wearing a company shirt and a company jacket (I told you I love my job, right?)


But, the best part of traveling on the company’s dime is the free meals.  So, we went to this place called “The Machine Shed” which was awesome.  Part of the awesomeness was this sign above me when I sat down:


They had all-you-can-eat fried chicken and I ate all that I could.  They also have great home-made applesauce (it’s more like a pie filling than applesauce in a jar.)  But, they also have an amazing brisket.  You can’t just get brisket anywhere, you know?


So, that is the fun part of the new job.  The more realistic side of it is this:  This summer I have to complete a safety and ergonomics analysis of every task in the factory.  And, now that we are building tillage equipment in the summer “off season” I basically have to do 4 major sections of the factory twice.  It works out to, like, 115 spreadsheets.  It is mostly tedious.  It is mostly the kind of job that gets done by grinding away at it a little bit each day—day after day after day.  On the other hand, that is the kind of thing I probably do “best.”  Not best is the sense that it is my best work or the pinnacle of my abilities, but best in the sense that most people in the world just can’t bring themselves to do a task like that.  They get bored.  They get sick-of-it.  They lose interest.  They get depressed.  I understand.  But, this basically describes the majority of my life for the first 18 years, so I am used to it.  Go figure. 


It also describes the kind of tasks I blog about here.  True story.