IKWYDLS 2012
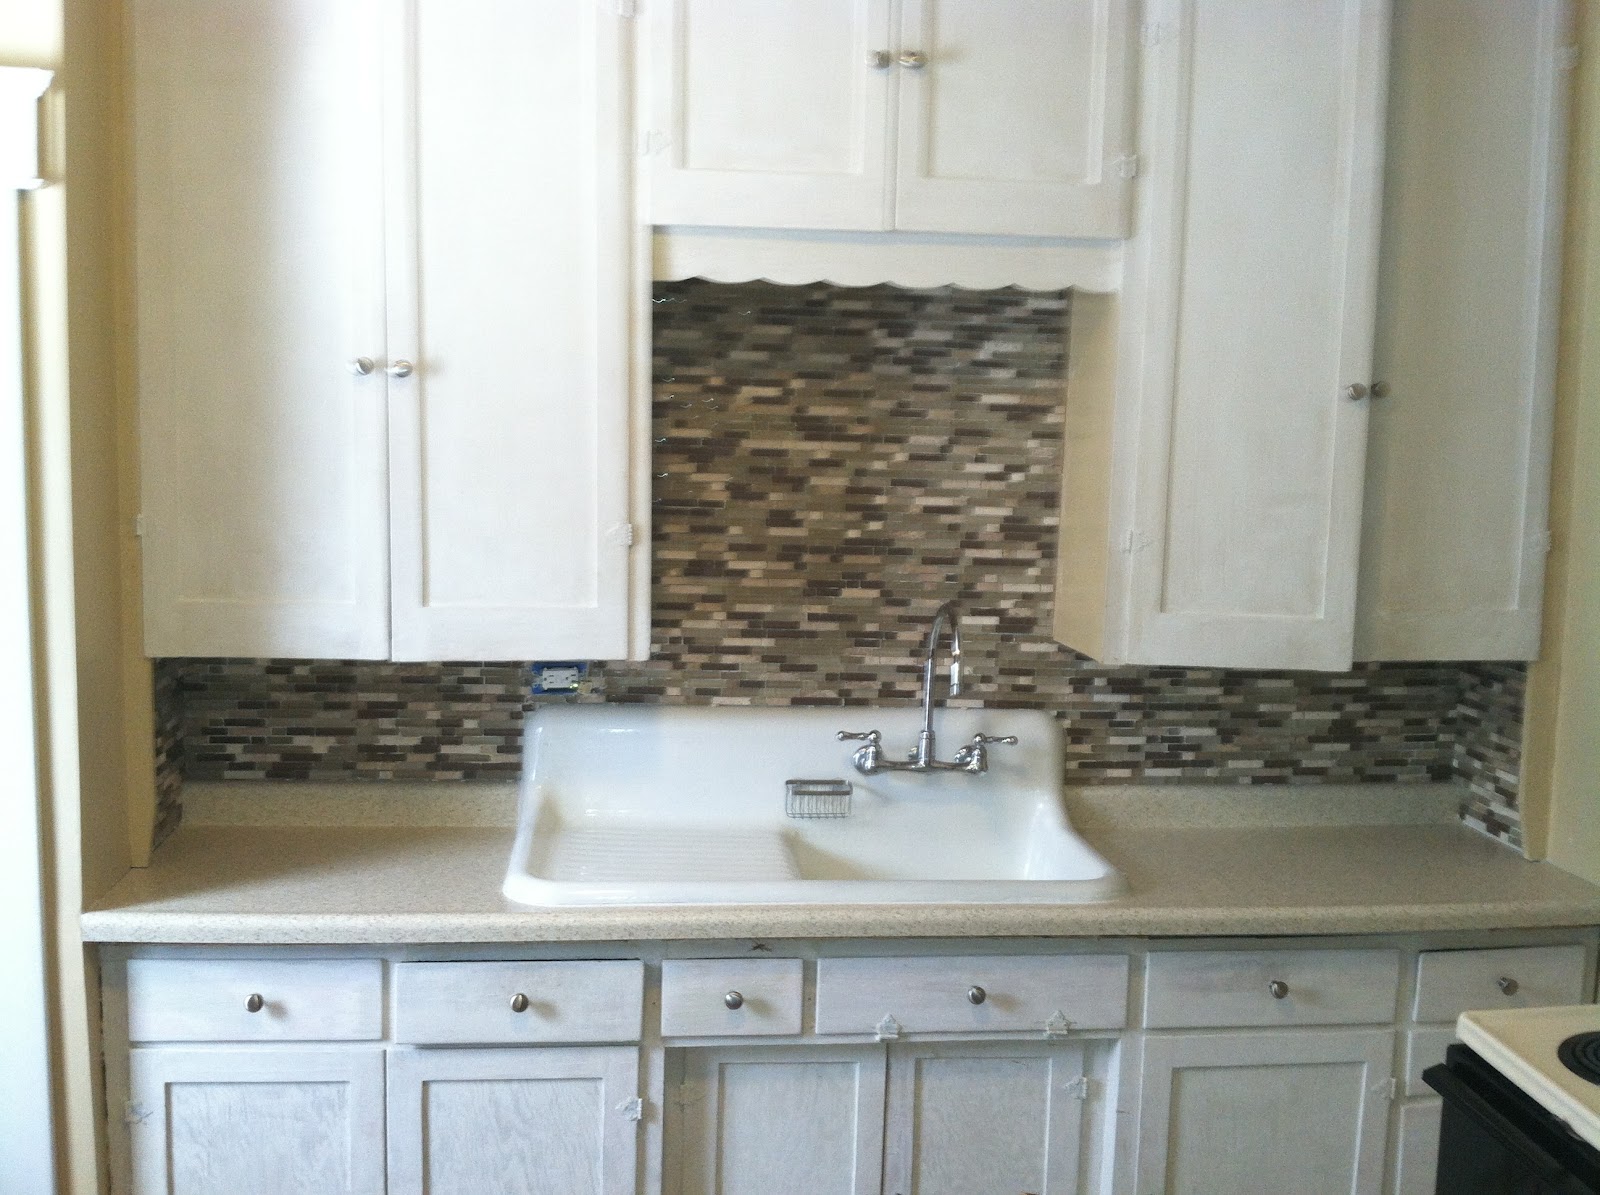
Day 2 of the "Holiday" weekend: Actually hang the tile.
First, take it all down and lay it all out so that I can put it back in the right order very quickly. Quickly is actually pretty important. I have never done this before, but the one thing that resonated in all the instruction I have read is that the mortar stuff that is used for it cures quickly. In fact, it says to not spread more than can be used in 10 minutes. Fair enough. My concern, though, is all I have is a 10lb bag of powder that has to be mixed with water. If I try to make it in 10 minute batches, I have a lot of measuring to do. All that leads to inconsistency. I took the chance that I could mix up the whole bag, with the recommended amount of water (1.5 to 1.7 quarts) and what stayed in the bucket would last long enough for the whole project. The 10 minute rule applies to what is on the wall, spread out at 3/16" inch-- not what is in the bucket. I was right. But, I wanted to move quickly either way. It took about 2 hours:
 It's a good thing that the stuff-in-the-bucket lasted so long, because I almost forgot to hand-place a few of the tile bits I had cut off yesterday for the corners of the sink... and around the outlet... and where the tile met against the wall without cutting (but the edges are staggered so one piece interlocks with the adjacent piece...) You can see why I forgot them all. Or not. Either way, I did, and it lasted just fine.
None of my jobs would be complete unless I had something really painstaking to do to it. In this case, some of the mortar squished through the mesh in the placing process and filled in the gap as if it was grout-- except I need that space for the real grout. So, I had to go back with fine-tipped tools (including a few toothpicks) to clean those back out. None of that is visible in the photos, of course. But, I did it. Honest. It took 2 more hours.
I also had to readjust the outlet. I'll show you a picture of the outlet when it is all done. It's one of those details that means almost nothing to anyone except me. The previous owners put it there to plug in the light over the "window." Since then, I have changed it to be GFCI (Hello! It's right by the sink!) and located through two layers of sheet rock and now a layer of glass tile. The original mechanism for holding it secure was designed for one layer of sheet rock only. Today, I had to get and use some of those thin little metal strips that slide in and bend over the edges to secure it in place. This is the first time I ever got them to work satisfactorily. I literally just sat and stared at the "finished" outlet (I still have the sealing and the grouting, blah, blah, blah...) for a few minutes. That's also why I am burning all these words to tell you about it.
Day 2 of the "Holiday" weekend: Actually hang the tile.
First, take it all down and lay it all out so that I can put it back in the right order very quickly. Quickly is actually pretty important. I have never done this before, but the one thing that resonated in all the instruction I have read is that the mortar stuff that is used for it cures quickly. In fact, it says to not spread more than can be used in 10 minutes. Fair enough. My concern, though, is all I have is a 10lb bag of powder that has to be mixed with water. If I try to make it in 10 minute batches, I have a lot of measuring to do. All that leads to inconsistency. I took the chance that I could mix up the whole bag, with the recommended amount of water (1.5 to 1.7 quarts) and what stayed in the bucket would last long enough for the whole project. The 10 minute rule applies to what is on the wall, spread out at 3/16" inch-- not what is in the bucket. I was right. But, I wanted to move quickly either way. It took about 2 hours:
None of my jobs would be complete unless I had something really painstaking to do to it. In this case, some of the mortar squished through the mesh in the placing process and filled in the gap as if it was grout-- except I need that space for the real grout. So, I had to go back with fine-tipped tools (including a few toothpicks) to clean those back out. None of that is visible in the photos, of course. But, I did it. Honest. It took 2 more hours.
I also had to readjust the outlet. I'll show you a picture of the outlet when it is all done. It's one of those details that means almost nothing to anyone except me. The previous owners put it there to plug in the light over the "window." Since then, I have changed it to be GFCI (Hello! It's right by the sink!) and located through two layers of sheet rock and now a layer of glass tile. The original mechanism for holding it secure was designed for one layer of sheet rock only. Today, I had to get and use some of those thin little metal strips that slide in and bend over the edges to secure it in place. This is the first time I ever got them to work satisfactorily. I literally just sat and stared at the "finished" outlet (I still have the sealing and the grouting, blah, blah, blah...) for a few minutes. That's also why I am burning all these words to tell you about it.

No comments:
Post a Comment